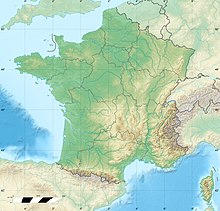
Battle of Hamel
| Battle of Hamel | |||||||
|---|---|---|---|---|---|---|---|
| Part of the Western Front of World War I | |||||||
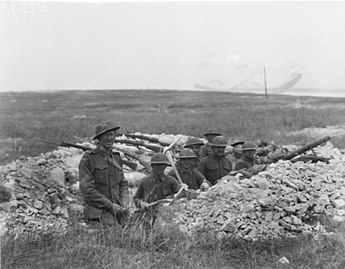 Australian and American troops dug in together during the Battle of Hamel | |||||||
| |||||||
| Belligerents | |||||||
|
|
| ||||||
| Commanders and leaders | |||||||
|
• |
• | ||||||
| Strength | |||||||
| ~7,000 | ~5,600 | ||||||
| Casualties and losses | |||||||
| 1,400 killed or wounded[1] |
2,000 killed or wounded 1,600 captured[2] | ||||||
The Battle of Hamel was a successful attack by Australian Army and US Army infantry, supported by British tanks, against German positions in and around the town of Le Hamel, in northern France, during World War I. The attack was planned and commanded by Lieutenant General John Monash, commander of the Australian Corps, and took place on 4 July 1918.
Many of the tactics employed, such as the use of combined arms, illustrated the evolution of military tactics, from the massed attacks mounted earlier in the war. All of the Allies' objectives were achieved within 93 minutes, just three minutes longer than Monash's calculated battle time.
To give the newly arrived American Expeditionary Force (AEF) combat experience, the five Australian infantry brigades involved were augmented by 10 companies from US Army battalions. However, six of these US infantry companies were withdrawn from the front line before seeing action. Hamel was the first time during World War I that elements of the AEF were commanded operationally by non-American officers.
Background
Military situation
In early 1918, as a result of the capitulation of Russia, the Germans began concentrating the bulk of their forces on the Western Front. Over the space of four months, up to 48 divisions were moved to the west.[3] Concentrating their efforts on the Somme Valley, the Germans launched a major offensive – the Spring Offensive – against the British southern flank on 21 March.[4] After pushing the Allies back towards the railhead at Amiens, the German advance in the sector was checked around Villers-Bretonneux in early April. As the German offensive exhausted itself, in June the Allies began to prepare for their own offensive, conducting a series of small-scale advances which became known as "peaceful penetrations".[5]
After the initial application of this technique around Morlancourt during the First, Second, and Third Battles of Morlancourt, the commander of the British Fourth Army, Lieutenant General Henry Rawlinson, decided that the next strike would come at the village of Le Hamel, Somme.[5] The German advance earlier in the year had created a "bulge" in the front line around the village, which had created a salient that exposed Allied troops in the sector to enfilading fire and enabled the Germans to observe Allied rear areas.[6] Capturing the village would help set an "aggressive posture" and relieve pressure in the sector. Lieutenant General John Monash, commander of the Australian Corps, was chosen to plan the attack.[5]
Geography
Located south of the River Somme, about 1.9 miles (3 km) north-east of Villers-Bretonneux on a spur between two hills, Hamel was strategically important to both the Allies and Germans. The high ground offered the Germans good observation of the sector, which they had been using to fire artillery barrages on Villers-Bretonneux,[7] and control of the village was vital if they wished to continue their offensive in the sector, and would enable them to continue to threaten Amiens, 11 miles (17 km) distant.[5] The Allied line was positioned on the reverse slope of a hill 1.5 miles (2.4 km) to the west of the village, and securing the village would enable the Allies to stiffen their defensive line. The village also acted as an obstacle to the proposed eastward advance through the Somme planned for later in the year and its capture would facilitate future offensive operations in the sector.[8]
Prelude
Planning
The Allied victory owed much to Monash's detailed planning and to the briefing of all the troops on their objectives.[9] The battle was his first as commander of the Australian Corps.[5] The Allies made novel use of a number of tactics, such as parachute drops of medical supplies and rifle ammunition in cases, and resupply by tank rather than by troops carrying supplies forward. The supply tanks and aircraft brought stores quickly to the troops as they advanced.[10] The carrying power of the tanks equated to about 1,200 troops doing the same job.[11] Signals were sent largely by cable and telephone, but new methods of signalling were also trialled, including the use of rockets which were used by some battalion headquarters to pass urgent messages to the rear, although this proved largely ineffective. Other techniques were more effective such as the use of pigeons, Lucas lamps, and for the first time, wirelesses were used by officers to send messages from captured objectives.[12][13]
There was advanced co-ordination between infantry, artillery and armour, and the latest, highly manoeuvrable Mark V tank was used after it had been demonstrated to Monash and Rawlinson.[11] Five companies (60 combat and four supply tanks) of the British 5th Tank Brigade were provided for the assault.[10] Although the Australians had worked with a small number of tanks successfully at Villers-Bretonneux, their opinion of the technology was clouded by the bad experience they had had of them in April and May 1917 around Bullecourt.[14] As such, to ensure co-ordination and overcome the problems the Australians had experienced at Bullecourt, the Australian infantry and tanks trained and lived together prior to the battle.[5] Coloured diagrams were painted on the sides of the tanks, corresponding to the battalions that they would support, so that the infantry knew which tank to follow.[15]
The battle plan called for a creeping barrage, in which the artillery barrage moves slowly in front of the advancing troops. This protected the troops by suppressing enemy activity, thereby easing their advance.[16] Over 600 British and French guns – 302 heavy and 326 field pieces[15] – were used for the barrage and counter-battery fire, including regular barrages in the days leading up to the attack. Monash was adamant that the infantry should not be sacrificed in an unprotected advance, hence his care to ensure that they were well covered.[6] Prior to the attack, the artillery spent two weeks conducting "conditioning firing" in the sector, firing gas and smoke shells at the same time every day before dawn, while strict operational security procedures were implemented.[17] In addition, 46 heavy machine-guns were placed in area support, while the number of Lewis Guns was increased to provide organic fire support.[16]
Australian Corps leadership crisis
Charles Bean, the official Australian war historian, noted that Monash was more effective the higher he rose within the Army, where he had greater capacity to use his skill for meticulous planning and organisation, and to innovate in the area of technology and tactics.[18] Bean had been no great admirer of Monash in his early career, in part due to a general prejudice against Monash's Prussian-Jewish background, but more particularly because Monash did not fit Bean's concept of the quintessential Australian character that Bean was in the process of mythologising in his monumental work Australia in the War of 1914–1918. (Both Bean and Monash, however, having seen the very worst excesses of Allied military doctrines and the waste of life on the Western Front, were determined that the role of the commander was to look after, and protect as far as possible, the troops under their command.) Bean wrote in his diary of Monash "We do not want Australia represented by men mainly because of their ability, natural and inborn in Jews, to push themselves".[19] He conspired with prominent journalist Keith Murdoch to undermine Monash and remove him from the command of the Australian Corps. They misled Prime Minister Billy Hughes into believing that senior officers of the Corps were opposed to Monash.[20] Hughes arrived at the front two days before the battle of Hamel, prepared to replace Monash. However, he first consulted with senior officers and heard their praise of their commander, and Monash also showed his superb power of planning for the upcoming battle. Hughes changed his mind and sustained Monash.[21]
Assaulting forces
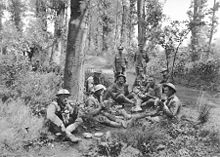
Estimating the German strength around Hamel as being around 5,600 (2,790 in the front line, with 2,860 in reserve),[22] Monash chose Major General Ewen Sinclair-Maclagan's Australian 4th Division to provide the bulk of the assaulting force. Consisting of three depleted brigades – the 4th, 12th and 13th – it was reinforced by two brigades that were detached from other divisions: the 6th from the 2nd Division and the 11th from the 3rd Division.[5] To avoid depleting the 4th Division too much, Monash determined that only the 4th Brigade would take part in the assault, along with the two reinforcing brigades, while a fourth brigade, the 15th, from the 5th Division, was assigned a diversionary role to north of the River Somme, launching a "feint" against Ville-sur-Ancre.[23][24] Conceived as an opportunity to employ a "combined arms" approach, Brigadier General Anthony Courage's British 5th Tank Brigade, equipped with the new Mark V tank, was assigned to support the attack, along with large quantities of aircraft and artillery.[5]
Rawlinson suggested to Monash in late June 1918 that American involvement in a set-piece attack alongside the Australians would give the American troops experience and strengthen the Australian battalions, which had been weakened by heavy casualties and falling recruitment, by an additional company each.[25] On 29 June, Major General George Bell, commanding the American 33rd Division, selected two companies, each of 250 men,[26] from the 131st and 132nd Infantry Regiments of the 65th Brigade.[27][6] Nevertheless, Monash had been promised 10 American companies, and on 30 June the remaining companies of the 1st and 2nd Battalions of the 131st Infantry Regiment were sent. Each American platoon was attached to an Australian company. For the 41st Battalion, they had 'A' Company wiped out by a gas attack recently at Villers-Bretonneux, so Americans were embedded as 'X' Company into the battalion.[28] A difficulty in integrating the 60-man American platoons into the 100-strong Australian companies was overcome by reducing the size of each American platoon by one-fifth and sending the removed troops, which numbered 50 officers and men, back to battalion reinforcement camps.[29] The commitment of these companies represented the first time in history that US Army troops would fight under a foreign commander.[7][30]
The Australian prime minister, Billy Hughes, addressed the troops on 2 July, two days before the attack was scheduled to commence.[31] The next morning, General John J. Pershing, the commander of the American Expeditionary Force in France, learnt of the plan and ordered the withdrawal of six American companies.[31] While a few Americans, such as those attached to the 42nd Battalion, disobeyed the order, the majority, although disappointed, moved back to the rear.[31] This meant that battalions had to rearrange their attack formations and caused a serious reduction in the size of the Allied force. For example, the 11th Brigade was now attacking with 2,200 men instead of 3,000.[32] There was a further last-minute call for the removal of all American troops from the attack, but Monash, who had chosen 4 July as the date of the attack out of "deference" to the US troops, protested to Rawlinson and received support from Field Marshal Douglas Haig, commander of the British Expeditionary Force.[31][7] In total, the Allied assault force totalled around 7,000 men.[33]
Defending forces
The German forces around Hamel consisted of two divisions – the 13th Division and the 43rd Reserve Division[34] – from General Georg von der Marwitz's Second Army.[35] The 13th Division consisted of the 13th, 15th and 55th Infantry Regiments, while the 43rd Reserve Division was made up of three reserve infantry regiments: the 201st, 202nd and 203rd. The 13th Division had only recently moved into position to the south of Hamel, having been rested for a month beforehand, while the 43rd Reserve Division had taken up position in Hamel to its north two weeks previously. Its 202nd Infantry Regiment held Hamel itself, while the 201st and 203rd were positioned on its right, stretching the line to the north. In the 13th Division's sector, the 55th Infantry Regiment held Pear Trench and part of Vaire Wood, the 13th Infantry Regiment held the remainder of Vaire Wood and part of the line to its south, while the 15th Infantry Regiment was further south around the Roman Road. Within Hamel itself, the 202nd occupied the line with two battalions forward, and one in depth, while further south the 13th Division's defensive scheme saw one battalion forward in each regimental area, with another positioned in support followed by a third in reserve.[36]
Battle
Initial barrage
At 22:30 on the night of 3 July, the British Mark V and Whippet tanks began to move from Fouilloy and Hamelet to their assembly areas half a mile (0.8 km) behind the front lines. Guides from the infantry marked out tracks from there to the battalions, which had already sent parties ahead to cut paths through their own wire.[37] Early the next morning, at 03:02, the supporting artillery opened up with its usual harassing bombardment. Having been conditioned over the past two weeks to expect a gas attack, the German defenders pulled on their gas masks, this "restricted their movement, situational awareness and ability to communicate".[38] Masked by the noise of the bombardment, the 60 tanks moved the last half-mile to the front line, while No. 101 Squadron of the British Royal Air Force provided additional cover by dropping three hundred and fifty 25-pound bombs to the east of the Australian front.[39] Each pilot in the squadron flew at least three missions between dusk and dawn.[40]
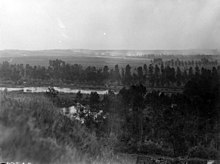
The artillery batteries gradually shortened their range until they reached the start line for the creeping barrage. Then, at 03:10, the main barrage began with flanking smoke screens laid down by the artillery and trench mortars. The creeping barrage began 200 yards (183 m) in front of the attacking troops and continued 600 yards (549 m) beyond that. The infantry rose along the whole line and began following the barrage at a distance of 75 yards (69 m). Although the barrage was mostly accurate, some rounds fell short at the junction of the 4th and 11th Brigades, virtually wiping out one American squad and one platoon of the 43rd Battalion. Further to the south, a dozen men of the 15th Battalion were killed and 30 wounded in a similar incident.[41]
At 03:14, the barrage advanced and the infantry continued to follow it into the cloud of smoke and dust – caused as the chalky ground was churned up by the exploding shells – which made observing the line of the barrage difficult and obscured some of the objectives in front of the infantry. The American troops, keen to keep up with the experienced Australians, dashed into the shell-fire and at least one Australian, Corporal Mick Roach,[39] was killed while turning round an American platoon that had entered the barrage.[42] The attack was then put in, coming up against three major German strong points: the "Pear Trench", the Vaire and Hamel Woods, and Hamel village itself.[38] Other fighting occurred on the periphery, with actions being fought as far south as the Roman Road – 4.0 miles (6.5 km) away[43] – and further to the north beyond the River Somme around Ville-sur-Ancre.[44]
Pear Trench
The Pear Trench, named because its shape, was one of many German defences that the assaulting force had to overcome. Situated south-west of Hamel on the "reverse slope of a gentle spur",[38] the Pear Trench formed the centre of the 4.0 miles (6.5 km) front over which the Australians attacked.[5] The 15th Battalion, from the 4th Brigade, was assigned to assault the position,[11] supported by three tanks.[38] From the outset things went awry. The tanks the 4th Brigade had been assigned had become lost in the darkness and failed to arrive on time; meanwhile, the artillery preparation in this sector had fallen short, and some shells had landed among the 15th Battalion as they had formed up for the assault, causing casualties and leaving part of the German defences unmolested and free to engage the infantry with machine-gun fire with heavy Maxim guns.[38]
Moving forward under fire towards the Pear Trench, the assaulting Australians found that their way was blocked by barbed wire. It had been intended that it would be cut by the barrage, but intact it presented a significant obstacle. While they attempted to move through it or over it, the German defenders began hurling grenades at them. With the tanks still coming up from the rear, the 15th Battalion's assault was temporarily checked.[45] At that point, the two Australian Lewis guns attached to each platoon went into action, providing covering fire for the advancing riflemen. The Lewis gun was a crew-served weapon normally fired from the prone position, but due to the tall crops which obscured the gunners' view of the target, the Lewis gunners stood up and fired from the hip, suppressing the German machine-guns. In doing so, they took heavy casualties, but they bought enough time for a company to rush two of the machine-guns. As another Maxim opened up on the left, Private Henry Dalziel, a "second" in a Lewis gun crew, charged the gun with just a revolver, killing its two-man crew and capturing another German. He was later awarded the Victoria Cross.[46]
Meanwhile, the fighting around the Pear Trench continued as the defenders held on in numerous machine-gun and mortar pits. The trench became the scene of heavy and confused fighting as the Australian infantry met grenades and machine-guns with bayonets. Amid the tide of the assault, some of the Germans tried to surrender, but as they did so others attacked the Australians attempting to capture them. After this, no quarter was given, and eventually, as the Australians enveloped the position from the flanks, they were able to clear the remaining pockets of resistance.[38] Exploiting the position, the Australians reached the designated halt-line and had stopped for "smoko" by the time the supporting tanks finally arrived.[47]
Vaire and Hamel Woods
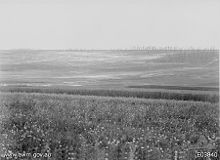
Situated to the south of both the village of Hamel and the Pear Trench, the Vaire and Hamel Woods were joined by a narrow strip of trees; the Hamel Wood was the northernmost of the two and situated in low ground that rose towards a hill where the Vaire Wood grew. To the west of the wooded area, on the other side of the road that linked Hamel with Villers-Bretonneux, the Germans had constructed a kidney-shaped trench, which the Australians had dubbed "Kidney" or "Vaire Trench".[48][38] Occupying a commanding view of the ground to the west, over which the Australian infantry had to assault, the position was reinforced with barbed wire, and anchored with multiple machine-gun posts.[49]
The 16th Battalion, supported by the 4th Trench Mortar Battery,[50] attacked in the centre of the 4th Brigade's position, with the 15th on its left,[47] and the 14th in reserve. Taking heavy fire from the edge of the wood and the northern part of the Kidney Trench, the battalion's lead company lost its commander and sergeant major, checking their advance. Flanking the enemy position, a single-handed effort by Lance Corporal Thomas Axford restored the situation. Rushing towards the enemy, after lobbing several grenades he broke in to the position at the point of the bayonet, killing 10 defenders and capturing six others. Like Dalziel, he was later awarded the Victoria Cross for his feat.[51] Large numbers of Germans were taken prisoner in the dugouts that adjoined the trench.[51] As the British tanks moved up in support, the 16th advanced through the trench and into the woods, before the 13th Battalion took over the advance towards a spur beyond the woods. Completing a complex passage of lines manoeuvre, one company dug in while two others flanked to north and another attacked head on, advancing over 550 yards (500 m) before wheeling into line abreast and advancing east to the spur.[52][53]
Hamel village
The task of taking the strong points around Hamel was assigned to the four battalions of the 11th Brigade and the 11th Trench Mortar Battery.[50] The 43rd, in the centre of the brigade, was tasked with taking the village itself, while the 42nd and half of the 44th would flank it from the left around Notamel Wood, and the other half of the 44th would flank it from the right.[11] The 41st Battalion was held back in reserve. As the main objective, the attack here was supported by 27 tanks, not including those that were supporting the efforts to take Pear Trench.[54] Located in a hollow, Hamel was about 870 yards (800 m) to the north-east of the Pear Trench. The main German strength was situated on the western side of the village and to the north around the woods.[54][38]
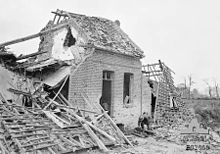
As in the Pear Trench sector, the tanks assigned to support the attack on Hamel had not arrived by the time the infantry reached the line of departure, which meant that they had to attack without armoured support.[38] As the 43rd went in straight against the defences, some of the German defenders began withdrawing.[38] As elements of the 43rd outflanked the German positions in the village through the edge of Notamel Wood,[38] heavy fighting broke out in Hamel and one group of Australians, along with their attached American platoon, killed 15 Germans and captured another 40.[13] Meanwhile, the 44th went in against the German trenches along the ridge line to the south. There, after the tanks finally arrived, they took large numbers of prisoners as they cleared out the trenches.[12] Around Notamel Wood, resistance was initially heavy as the German positions were well-sited to provide interlocking fields of fire. The company of the 43rd on the edge of the wood was held up briefly by a machine-gun enfilading their line of advance before a tank crushed the position;[13] further north, the 42nd Battalion, after briefly becoming confused, had been moved into position with precision drill,[55] and as the combined weight of air support, artillery and armour was brought to bear the German resistance in the wood melted away.[13]
Once Hamel had been successfully invested and most resistance had ceased in the village, a brief halt was called. During this time, small actions continued as a German machine-gun post north of the Pear Trench was silenced by a Lewis gun team and a group of Americans.[13] The second phase of the attack resumed after a 10-minute pause,[44] as the men of the 43rd Battalion began to clear the remaining German defenders from the village and the nearby quarry. The British tanks fired machine-guns and cannons that fired grape-shot in the confined spaces of the village. As the sun began to rise they were no longer inhibited by the darkness and came to dominate the situation,[43] winkling out isolated pockets of resistance in the areas that had already been captured.[44]
Southern flank
The southern flank of the attacking front stretched east along the Roman Road. Positioned on the right of the 4th Brigade, two battalions from the 6th Brigade – the 21st and 23rd – had been given the task of securing this area with a trench mortar battery, the 6th, in direct support. They were reinforced by the 25th Battalion, which had been detached from the 7th Brigade,[50] which was tasked with assaulting the end of the line, where they would be exposed to fire from the flanks.[43]
Once the attack was launched, the 21st Battalion went in on the left, and supported by the creeping barrage and tanks, overcame relatively light German resistance. The 23rd also advanced "smoothly",[13] although it was resisted more strongly. The 25th, however, fared the worst.[44] Due to their exposed position on the right of the Australian line, the 25th Battalion was supported by the Australian Heavy Trench Mortar Battery; nevertheless the 25th suffered heavily, losing almost two entire platoons as German machine-gun positions cut through their ranks.[56] As the Germans launched a counter-attack, a request for emergency artillery support was sent via a distress flare, and another platoon was brought up to stem the tide and eventually the 25th secured their objective north of the Roman Road.[44][51] The tanks were instrumental in breaking the German will for further counter-attacks, aggressively pushing 1,100 yards (1,000 m) beyond the Allied line,[57] moving into Accroche Wood to harass the German rear during the second phase of the attack.[44]
Feint attack at Ville-sur-Ancre
To draw German attention away from Hamel and provide some security to the northern flank, Monash ordered the 15th Brigade, under Brigadier General Harold Elliott, to undertake a "feint" north of the River Somme, to capture the high ground north-east of Hamel.[15] The feint was a key part of the Allied deception plan to mask the size of the attack at Hamel and disrupt German efforts to counter-attack or reinforce the village.[44][58] The 15th Brigade, comprising the 57th, 58th, 59th and 60th battalions were committed, with the 15th Trench Mortar Battery in support. Elements of the 14th Brigade also supported the effort.[50]
Early on 4 July, the feint began with a demonstration by the 55th Battalion around Sailly-Laurette, in the 14th Brigade sector. The Australians employed dummies to draw German machine-gun fire to one part of the line, while a 200-strong company group raided the German line elsewhere. As German artillery rose to meet the threat, Australian casualties began to mount. A second wave followed up, capturing the German front line, before the Australians withdrew having taken a small number of Germans prisoner.[59] In the 15th Brigade sector, opposite the German 52nd and 232nd Reserve Infantry Regiments, the main part of the feint was launched at 03:10, to coincide with the assault on Hamel, to capture and hold part of the German trench line around Ville-sur-Ancre.[44][60] An understrength company from the 58th Battalion attacked beside the River Ancre across a 770 yards (700 m) front, while two companies from the 59th Battalion put in an attack against a 550-yard (500 m) line of German outposts that were scattered along a road.[61] The attack began with the artillery of the Australian 5th Division, as well as corps artillery, including heavy guns and two extra trench mortar batteries.[62]
Progress in the centre of the Australian attack was stalled by wire obstacles and massed machine-gun fire but flanking attacks restored the situation before the fighting devolved into a series of grenade attacks.[63] On the left, stretched thin across too broad a front, the attack faltered but the individual efforts of junior officers and senior non-commissioned officers spurred the men into action, charging machine-gun posts, capturing a mill house on the Ancre, which had been turned into a fortified position and holding it, despite local German counter-attacks.[64] As the position on the left was uncertain, elements of the 57th Battalion were sent forward and the line around Ville-sur-Ancre secured. In the aftermath, the Germans began shelling the position from guns on the Morlancourt Heights. Later, a battalion from the 247th Reserve Infantry Regiment of the 54th Reserve Division began forming up for a counter-attack but this was broken up by Australian and British artillery.[65][66]
Aftermath
Consolidation and German counter-attack
All the Allies' objectives were achieved in 93 minutes,[1] just three minutes more than Monash's calculated battle time of 90 minutes.[13] After taking the village, the Australians and Americans began rebuilding the shattered defences. Mopping up was completed in the Vaire and Hamel Woods by 06:00 and in Hamel by 07:00.[44] Supplies were brought up on four gun carrier tanks and at 04:45, reconnaissance aircraft from No. 3 Squadron of the Australian Flying Corps, began photographing the new front line for map making.[67][44] At 06:00, No. 9 Squadron RAF, began flying supply sorties, employing parachute drops that had been developed by a team led by Australian Captain Lawrence Wackett.[68] Air attacks behind the line by Nos. 23, 41,and 209 Squadrons maintained pressure on the Germans, although this was stopped around 09:30 when the Germans dispatched 30 fighter aircraft to Hamel to contest control of the skies.[44]
The Australians and Americans worked to consolidate the captured position. The tanks remained in support until 17:30 when they were withdrawn, taking some of the wounded with them.[68] Throughout the night, German snipers fired on the Allied line and the Allied troops advanced another 400 yards (370 m) and by the morning of 5 July, took another 700 prisoners.[68] The Germans continued to harass the Australian troops around Hamel the rest of the day, undertaking brief air attacks and firing artillery bombardments as they prepared for a counter-attack.[68]
A German counter-attack came at around 22:00 that night. Amid phosgene and mustard gas bombardments, Stosstruppen and an infantry company of about 200 men from the 201st Infantry Regiment of the 43rd Reserve Division broke into the 44th Battalion sector around Le Hurleux, a hill dubbed "Wolfsberg" by the Germans where they had established a strongpoint prior to the battle.[69][70] The Germans forced a 200-yard (180 m) gap in the line between two companies and captured a dozen Australian stretcher-bearers but were unable to bring up reinforcements as British artillery began firing in their rear. As the 44th Battalion began to rally, it was reinforced by the 43rd Battalion and the Americans attached to it.[71][68] At 02:00 on 6 July, the two battalions counter-attacked. The experienced German storm-troopers checked the drive at first, fighting behind trench blocks but they were eventually overwhelmed by an attack from the flanks, as the Australians assaulted their position with grenades and clubs.[72] The effect shocked the Germans and forced them back, restoring the Allied line and releasing the captured stretcher-bearers.[73]
Analysis
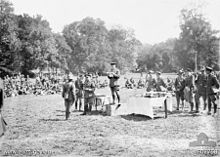
While small in scale, the Battle of Hamel was to have far-reaching consequences for trench warfare, because, like the Battle of La Malmaison and the Battle of Cambrai in 1917, it provided a practical demonstration of tactics for attacking an entrenched enemy using combined arms tactics.[10] The methods employed at Hamel succeeded on a much larger scale in the Battle of Amiens and was a major factor in Allied successes later in the war. The result received strong praise from French Premier Georges Clemenceau, who later toured the battlefield and addressed the troops that had taken part.[8] Bernard Montgomery, who ended the war as a divisional chief of staff and the Second World War as a field marshal, called Monash the best World War I general on the Western Front.[74]
While the result represented a significant reverse for the Germans, it did not put an end to their offensive campaign on the Western Front. Less than a fortnight later, the Germans launched a strong attack on the French during the Second Battle of the Marne.[75][76] The four American companies that had joined the Australians during the assault were withdrawn from the line after the battle and returned to their regiments, having gained valuable experience. Monash sent Bell his personal thanks, praising the Americans' gallantry, while Pershing set out explicit instructions to ensure that US troops would not be employed in a similar manner again.[77] They would subsequently play a significant role in the fighting that followed right up until the end of the war, as US reinforcements came to tip the manpower balance in favour of the Allies.[75]
Casualties
Allied losses amounted to around 1,400 killed or wounded.[1] There were 1,062 Australian casualties (including 800 dead) and 176 American casualties (including between 13 and 26 killed) during the main attack and a further 142 casualties among the 15th Brigade during their diversionary assault around Ville.[50] Around 2,000 Germans were killed and 1,600 captured, along with the loss of much of their equipment.[78] Despite the concerns of the Australian infantry, all but three of the British tanks, although delayed reached their objectives.[68] At least five of the Allied tanks were damaged during the attack but these were later repaired.[44] Casualties among the British tank crews amounted to 13 killed or wounded.[68] The Allied casualties were "light" in the context of World War I and the attack was considered "extremely successful" for the Australians.[1] A large quantity of British equipment that had been captured by the Germans when they had taken Hamel in April was also recovered.[77]
Recognition

Two Australians, Thomas Axford and Henry Dalziel, were awarded the Victoria Cross for their conduct during the battle.[79] Fourteen Americans were also decorated by the British, including four Distinguished Conduct Medals, four Military Crosses, and six Military Medals.[80] Corporal Thomas A. Pope, who had rushed a German machine-gun during the German counter-attack on 5 July, was one of those who received the DCM, being awarded the medal personally by George V on 12 August 1918. He would also later receive the Medal of Honor.[77] Joseph B. Sanborn recommended twenty-two members of the 131st Infantry Regiment for valour awards.[81] Pope and seven other doughboys were also awarded the US Army's Distinguished Service Cross for actions during the Battle of Hamel.[82]
Notes
- ^ a b c d Richardson 2011, p. 37.
- ^ Bean 1942, pp. 326–327.
- ^ Baldwin 1962, p. 126.
- ^ Baldwin 1962, p. 140.
- ^ a b c d e f g h i Richardson 2011, p. 32.
- ^ a b c Nunan 2000, p. 26.
- ^ a b c Perry 2004, p. 31.
- ^ a b Andrews & Jordan 1991, p. 5.
- ^ Andrews & Jordan 1991, p. 6.
- ^ a b c Coulthard-Clark 1998, p. 148.
- ^ a b c d Andrews & Jordan 1991, p. 8.
- ^ a b Laffin 1999, p. 80.
- ^ a b c d e f g Nunan 2000, p. 31.
- ^ Laffin 1999, p. 114.
- ^ a b c Andrews & Jordan 1991, p. 10.
- ^ a b Andrews & Jordan 1991, p. 11.
- ^ Richardson 2011, p. 33.
- ^ Serle 1982, pp. 385–387.
- ^ Serle 1982, p. 301.
- ^ Perry 2004, p. 346.
- ^ Perry 2004, p. 349.
- ^ Laffin 1999, p. 66.
- ^ Coulthard-Clark 1998, pp. 148–149.
- ^ McAulay 2013, p. 70.
- ^ Bean 1942, p. 262.
- ^ Laffin 1999, p. 65.
- ^ Bean 1942, p. 263.
- ^ 41st Bn War Diary July 1918.
- ^ Bean 1942, p. 265.
- ^ Huidekoper 1921, p. 38.
- ^ a b c d Nunan 2000, p. 28.
- ^ Bean 1942, p. 276.
- ^ Laffin 1999, p. 72.
- ^ Bean 1942, pp. 313.
- ^ Tucker 2014, p. 944.
- ^ Bean 1942, pp. 313–314.
- ^ Bean 1942, p. 280.
- ^ a b c d e f g h i j k Richardson 2011, p. 34.
- ^ a b Laffin 1999, p. 75.
- ^ Bean 1942, p. 281.
- ^ Bean 1942, p. 285.
- ^ Bean 1942, pp. 286–287.
- ^ a b c Laffin 1999, p. 82.
- ^ a b c d e f g h i j k l Richardson 2011, p. 36.
- ^ Laffin 1999, p. 77.
- ^ Laffin 1999, pp. 77–78.
- ^ a b Laffin 1999, p. 78.
- ^ Laffin 1999, p. 70.
- ^ Laffin 1999, pp. 78–79.
- ^ a b c d e Laffin 1999, p. 111.
- ^ a b c Nunan 2000, p. 30.
- ^ Richardson 2011, p. 35.
- ^ Laffin 1999, pp. 80–81.
- ^ a b Laffin 1999, p. 81.
- ^ Laffin 1999, pp. 81–82.
- ^ Laffin 1999, pp. 82–83.
- ^ Laffin 1999, p. 83.
- ^ Laffin 1999, p. 87.
- ^ Laffin 1999, pp. 87–88.
- ^ McAulay 2013, p. 74.
- ^ Laffin 1999, p. 89.
- ^ Laffin 1999, pp. 89–90.
- ^ Laffin 1999, pp. 90–91.
- ^ Laffin 1999, pp. 91–92.
- ^ Laffin 1999, pp. 92–93.
- ^ McAulay 2013, p. 80.
- ^ Nunan 2000, pp. 31–32.
- ^ a b c d e f g Nunan 2000, p. 32.
- ^ Laffin 1999, p. 95.
- ^ Australian Corps Memorial.
- ^ Laffin 1999, p. 96.
- ^ Laffin 1999, pp. 96–97.
- ^ Laffin 1999, p. 97.
- ^ Laffin 1999, p. 139.
- ^ a b Baldwin 1962, p. 146.
- ^ Neillands 2004, p. 480.
- ^ a b c Nunan 2000, p. 80.
- ^ Coulthard-Clark 1998, p. 149.
- ^ Laffin 1999, p. 164.
- ^ Laffin 1999, p. 124.
- ^ Dando-Collins 2018, p. 225.
- ^ New York Times 17 October 1918.
References
- "41st Infantry Battalion War Diary – July 1918 part 1". Australian Imperial Force unit war diaries, 1914–18 war. Australian War Memorial. Retrieved 26 April 2018.
- Andrews, E.M.; Jordan, B.G. (1991). "Hamel: Winning A Battle". Journal of the Australian War Memorial (April): 5–12. ISSN 1327-0141.
- "Australian Corps Memorial". Australians on the Western Front. Department of Veterans Affairs. Retrieved 26 April 2019.
- Baldwin, Hanson (1962). World War I: An Outline History. London: Hutchinson. OCLC 988365.
- Bean, C.E.W (1942). The Australian Imperial Force in France during the Allied Offensive, 1918. Official History of Australia in the War of 1914–1918. Vol. VI. Sydney, New South Wales: Angus and Robertson. OCLC 41008291.
- Coulthard-Clark, Chris (1998). Where Australians Fought: The Encyclopaedia of Australia's Battles (1st ed.). St Leonard's, New South Wales: Allen & Unwin. ISBN 1-86448-611-2.
- Dando-Collins, Stephen (2018). Heroes of Hamel. Milsons Point, New South Wales: Vintage Books. ISBN 978-0-14378-760-0.
- "Eight of Pershing's Men Who Fought at Hamel Get Distinguished Service Cross". The New York Times. 17 October 1918. Retrieved 29 June 2013.
- Huidekoper, Fredrick L. (1921). The History of the 33rd Division, A.E.F. Springfield, Illinois: Illinois State Historical Society. OCLC 163049731.
- Laffin, John (1999). The Battle of Hamel: The Australians' Finest Victory. East Roseville, New South Wales: Kangaroo Press. ISBN 0-86417-970-7.
- McAulay, Lex (2013). "The Action at Ville-sur-Ancre, 4 July 1918". Australian Infantry Magazine. No. October 2012 – April 2013. Surfers Paradise, Queensland: Power Pacific International. pp. 70–72, 74–80. ISSN 1447-5545.
- Neillands, Robin (2004) [1999]. The Great War Generals On the Western Front 1914–1918. London: Magpie Books. ISBN 1-84119-863-3.
- Nunan, Peter (2000). "Diggers' Fourth of July". Military History. 17 (3): 26–32 & 80. ISSN 0889-7328.
- Perry, Roland (2004). "The Man Who Stormed Hamel Against the Odds". The Daily Telegraph (8 November 2004 ed.). Sydney. p. 31. ISSN 0312-6331.
- Richardson, Andrew (2011). "Hamel, 1918". Despatches Magazine: The Newsletter of the Australian Army History Unit (1): 32–37. OCLC 771957938.
- Serle, Geoffrey (1982). John Monash: A Biography. Carlton, Victoria: Melbourne University Press. ISBN 0-522-84239-9.
- Tucker, Spencer (2014). World War I: The Definitive Encyclopedia and Document Collection. Vol. I: A - C (2nd ed.). Santa Barbara, California: ABC-CLIO. ISBN 978-1-85109-964-1.
Further reading
- FitzSimons, Peter (2018). Monash's Masterpiece: The Battle of Le Hamel and the 93 Minutes that Changed the World. ISBN 978-0-7336-4008-7.
- Game, Bill (2010). The Story of an Australian Soldier's Experiences in the Mud and Blood of WWI. ISBN 978-0-646-53192-2.
- Pedersen, P. A. (2003). Hamel. L. Cooper. ISBN 0-85052-938-7.
External links
- "The Battle of Hamel: History and Memory".
- Peter Greste. "Monash and Me". Peter Greste on Australia's Great Commander. Australian Broadcasting Corporation. Retrieved 4 July 2018.
- "World War I: Battle of Hamel". Historynet.com. 18 August 2006.
- "Battles – The Battle of Le Hamel, 1918".

